Peloton Bike+ Install Instructions
Approximate installation time: 6 min.
*Must have an initial Peloton subscription in order to install Fitswitch and associated apps*
Installation Video
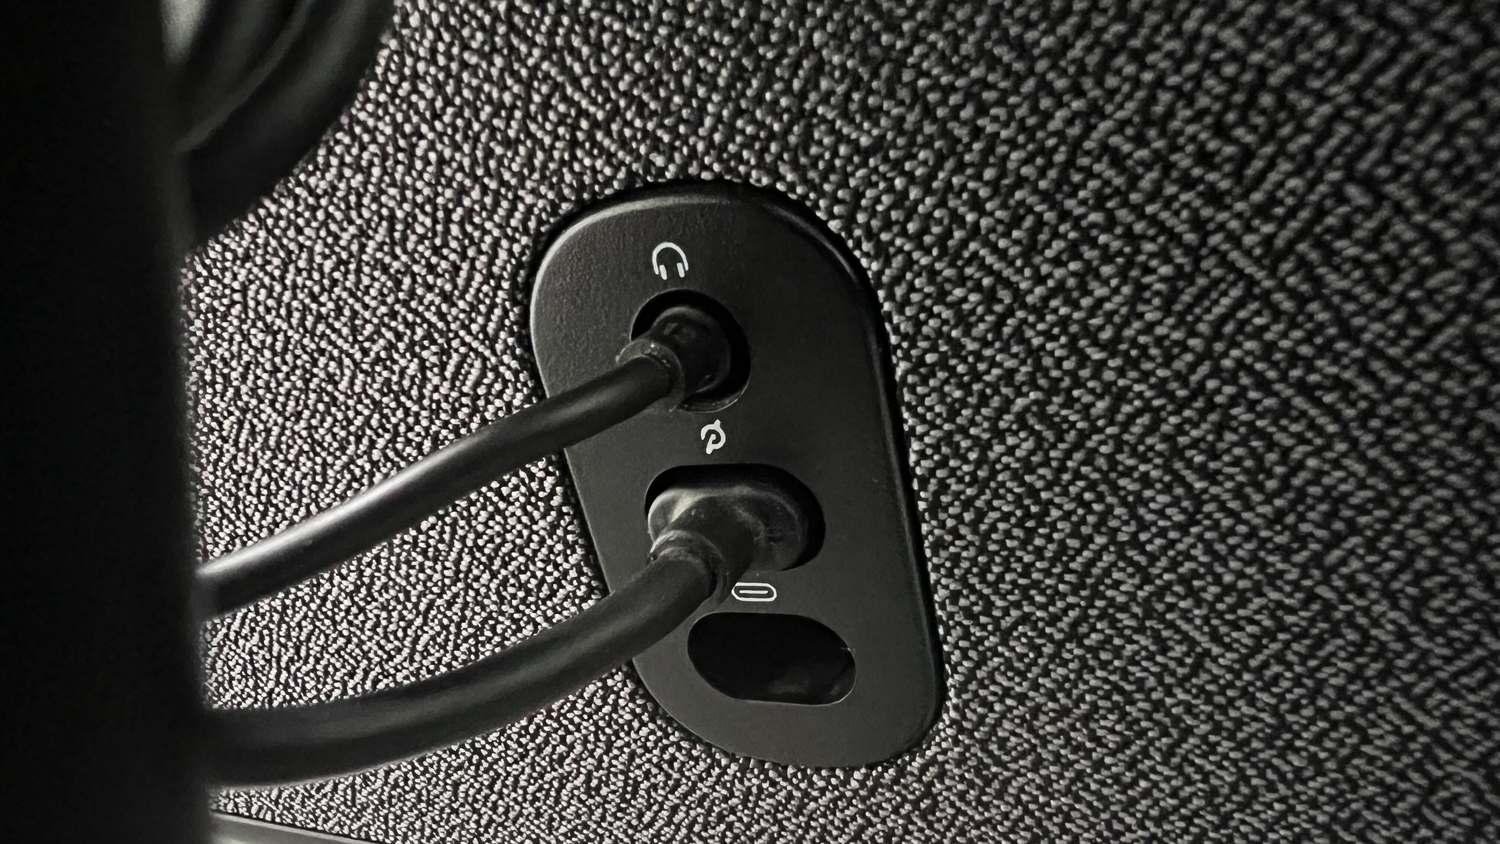
Ensure the cables on the rear of your screen are securely plugged in, and that the bottom USB-C port is available to be plugged into
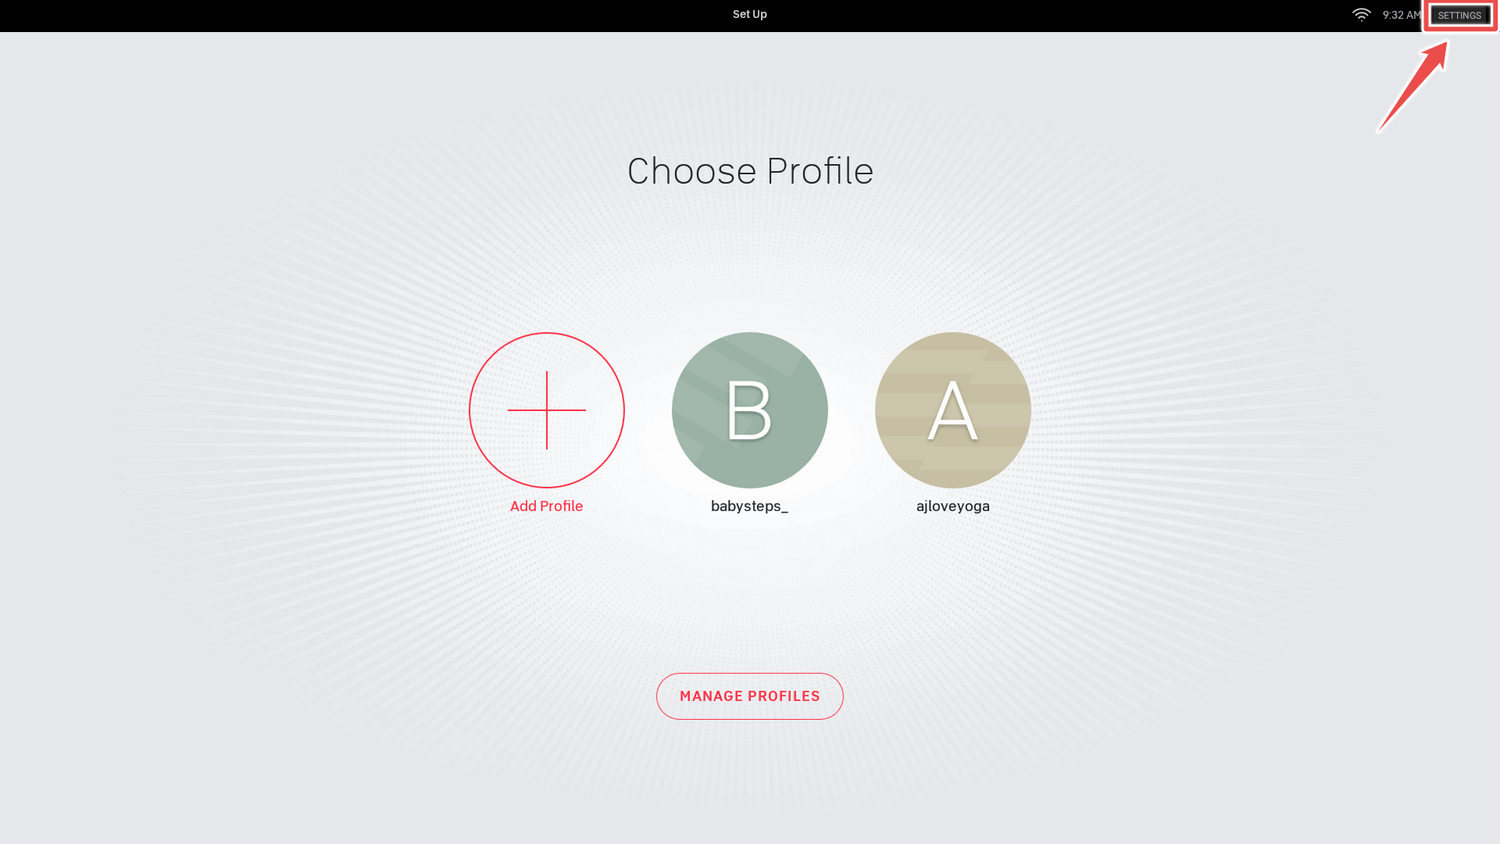
Tap 'settings' in top right corner.
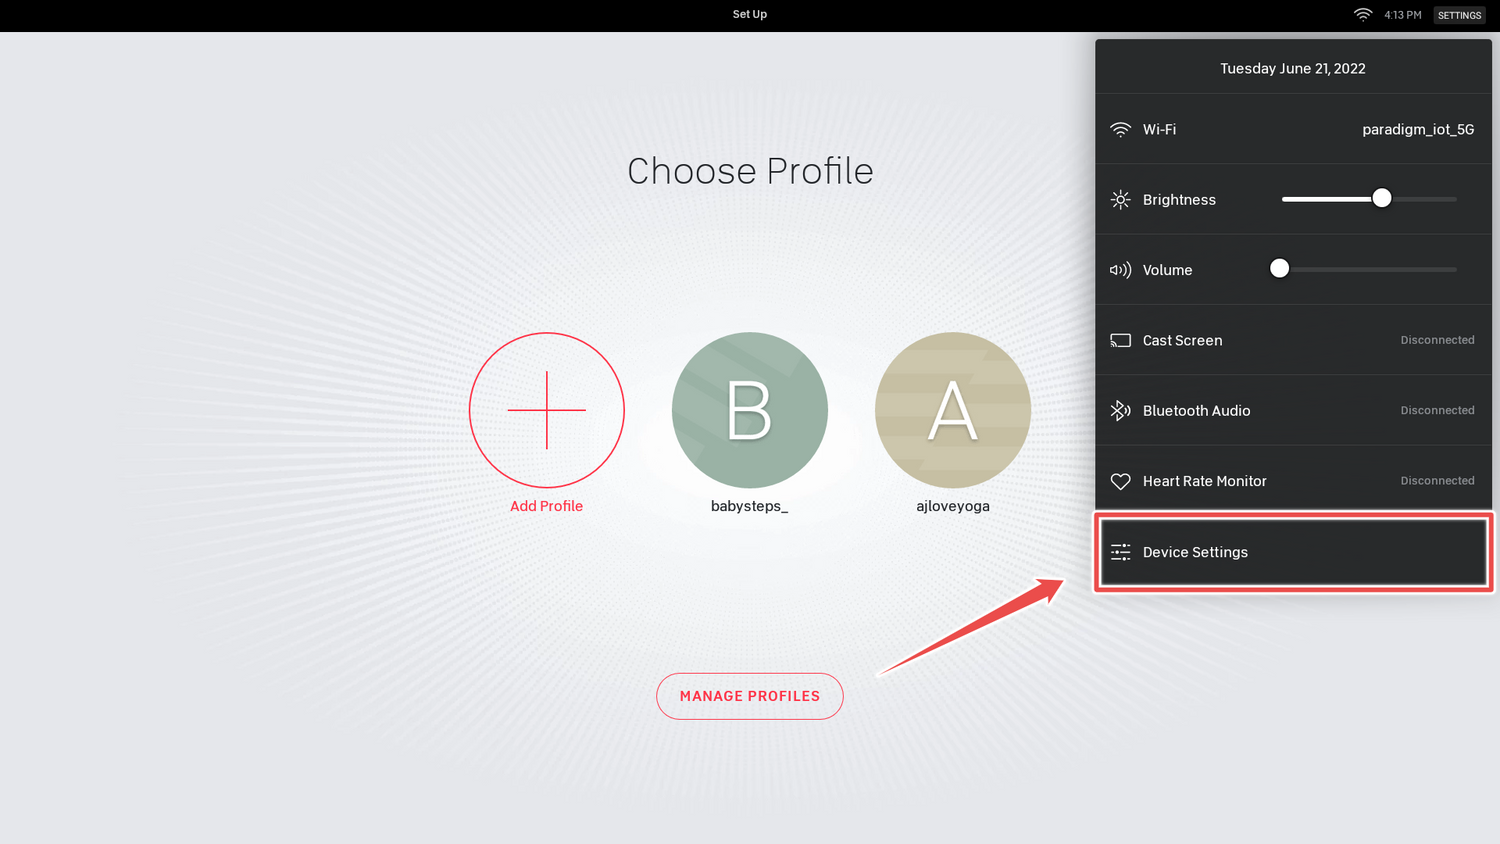
Tap on Device Settings.
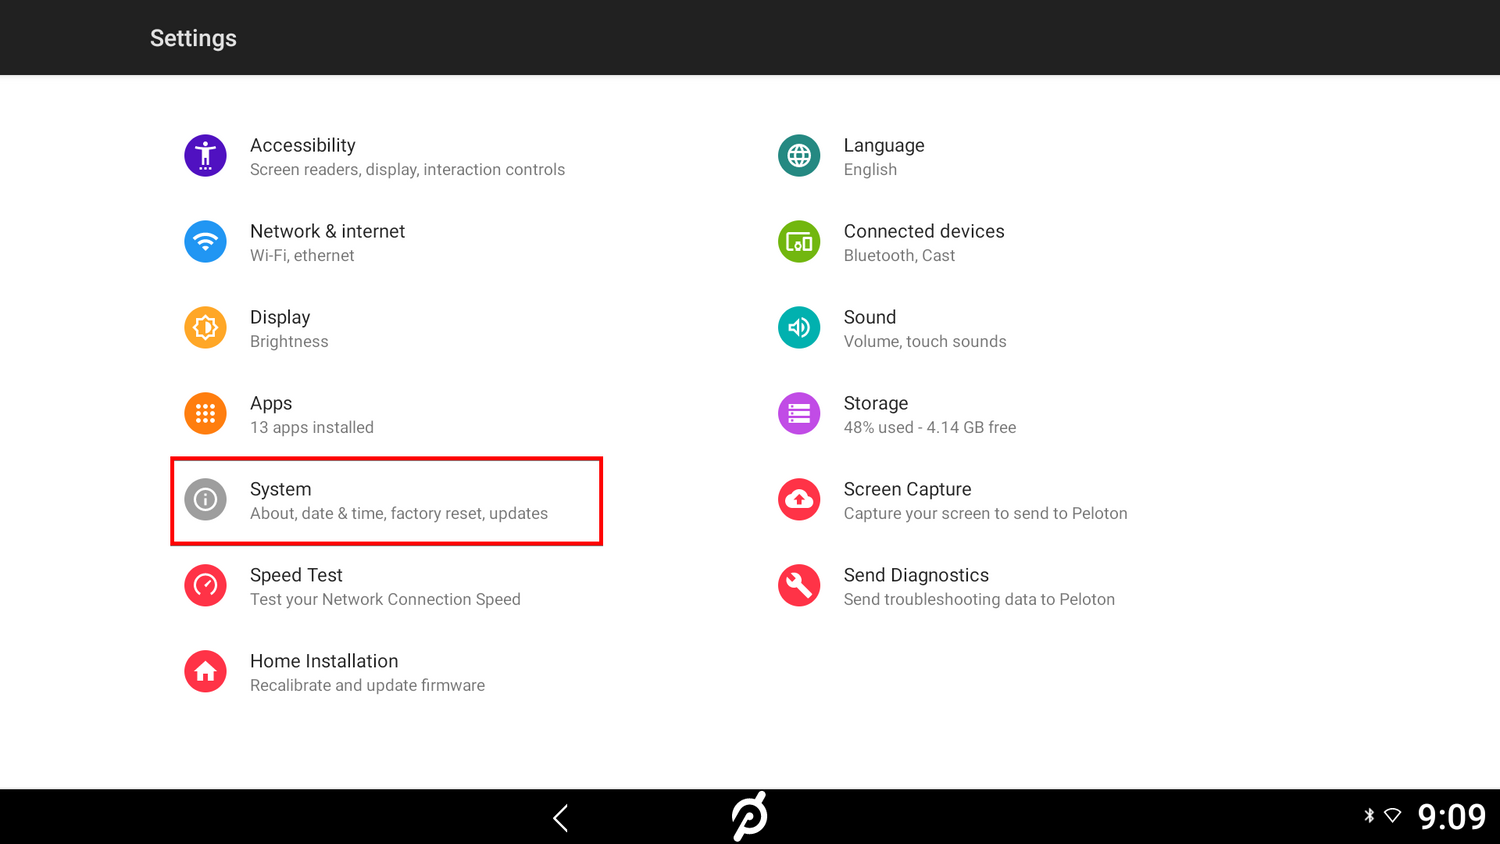
Tap on System.

Tap on About Tablet.
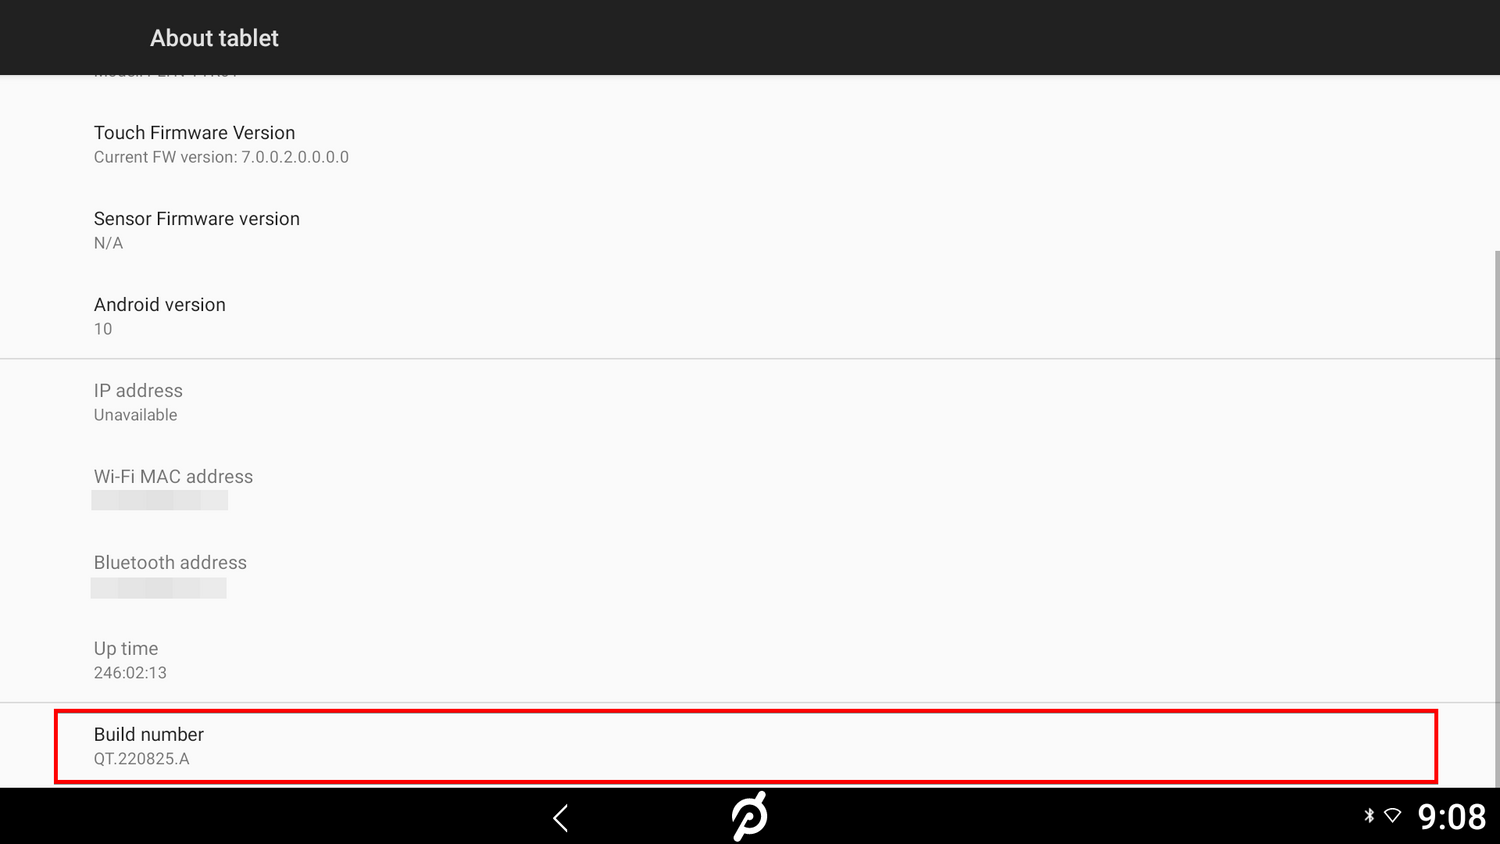
Tap 7 Times on "Build Number"
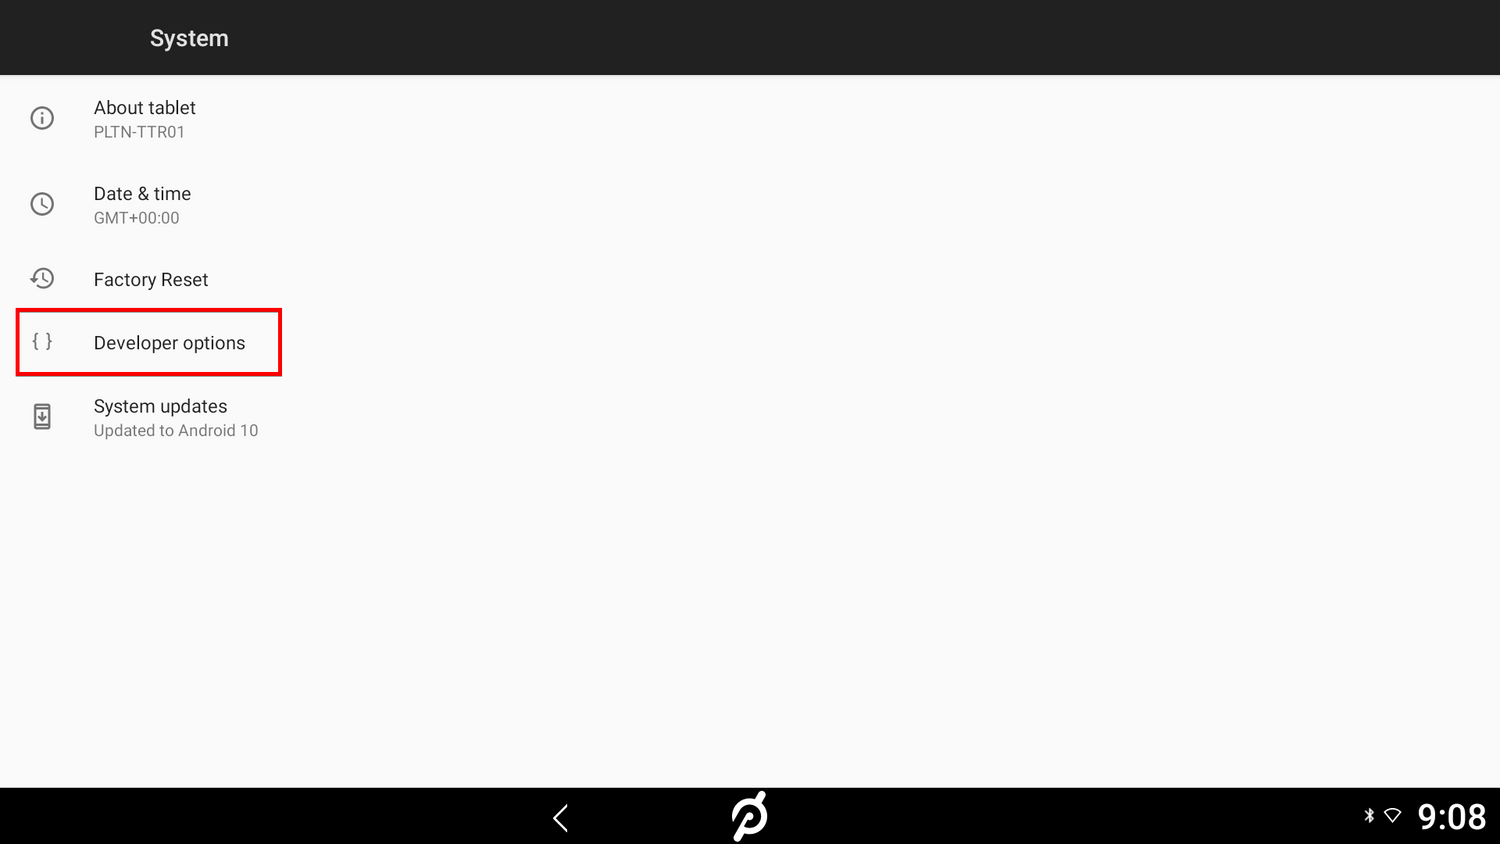
Return to settings by tapping on the arrow at the bottom of the screen and tap on "Developer options."
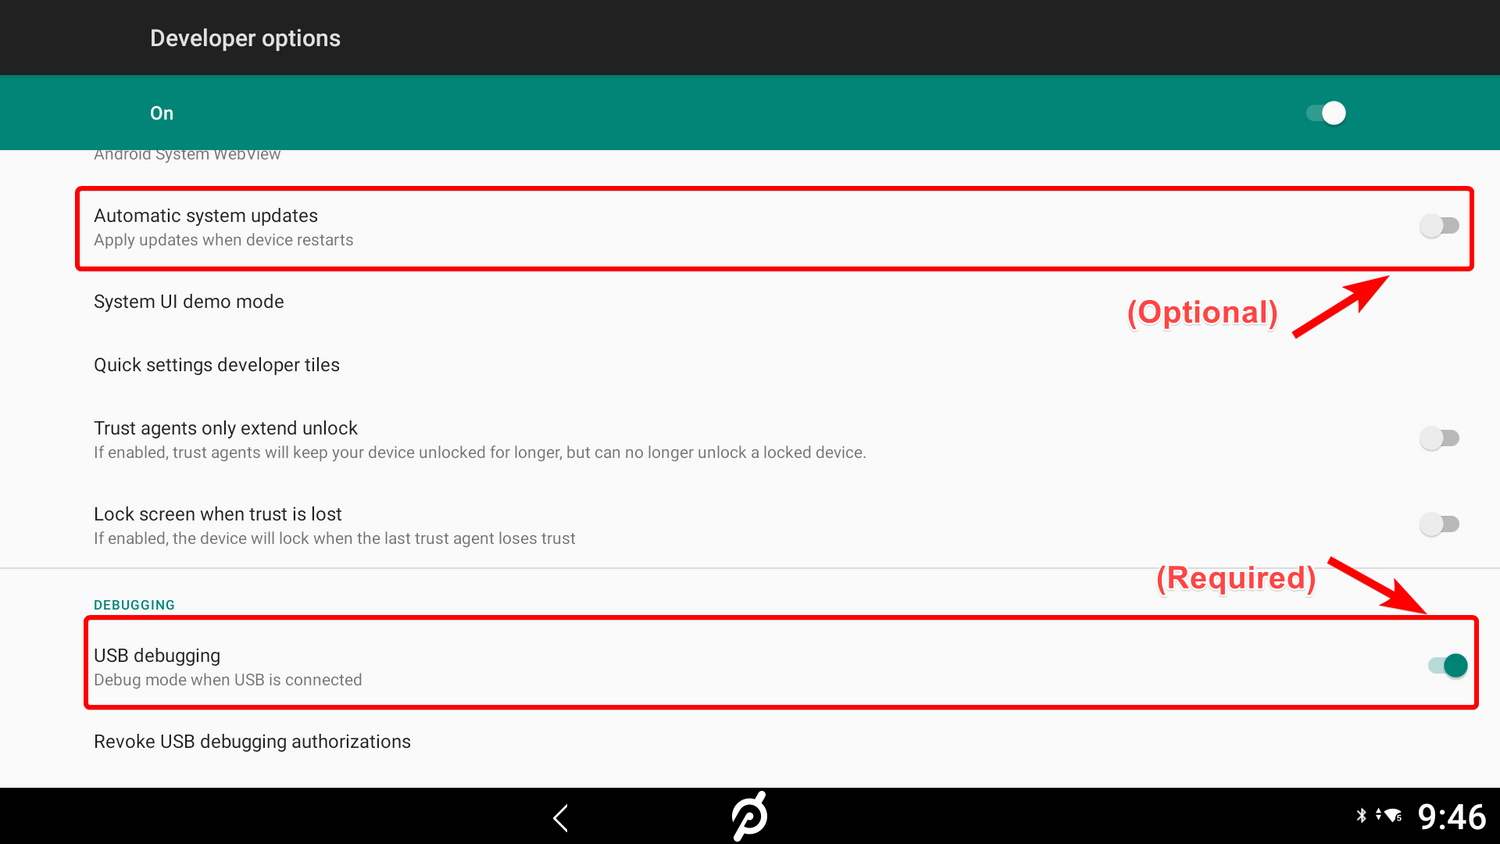
Scroll down to "USB debugging" and turn on USB debugging. (Optional) You can turn off Automatic System Updates here as well to prevent updates from potentially breaking fitswitch functionality
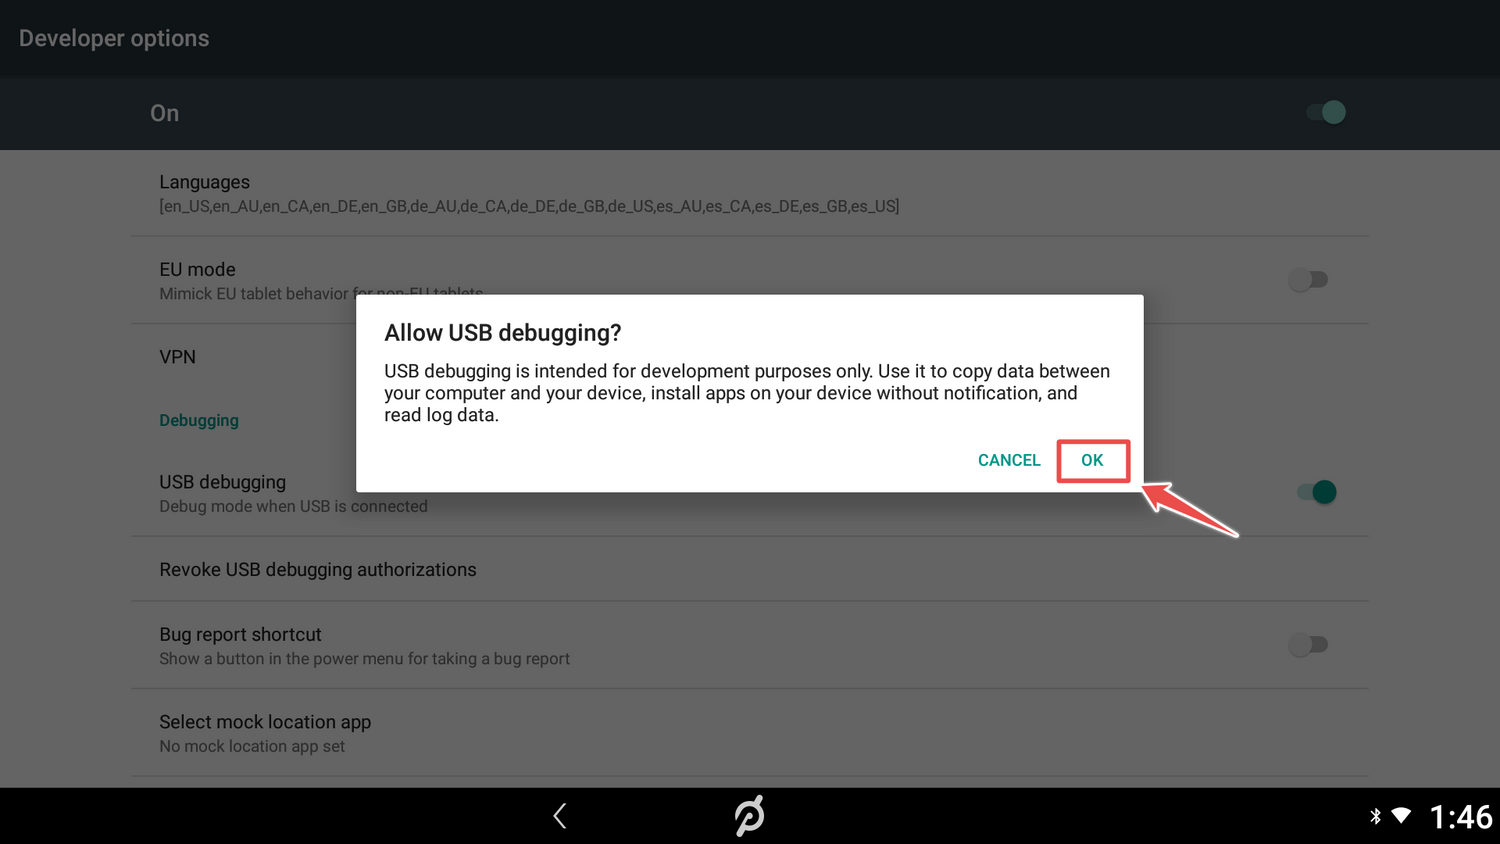
Tap on "ok."
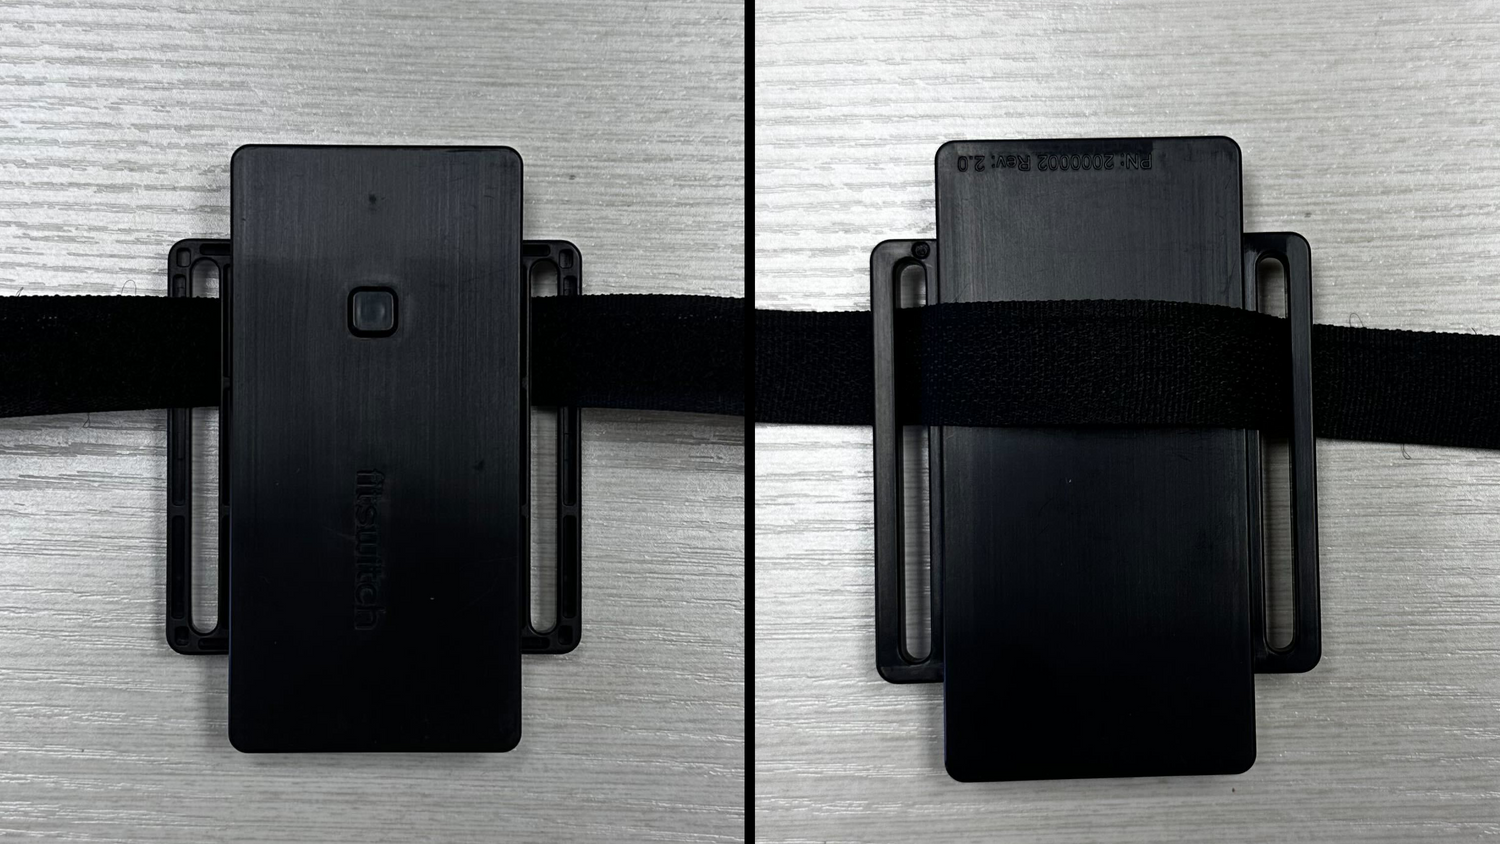
Insert the non loop end of the velcro strap through the fitswitch as show. Make sure that the soft side is facing up. Bring the loop end of the strap close to the handles of the fitswitch.
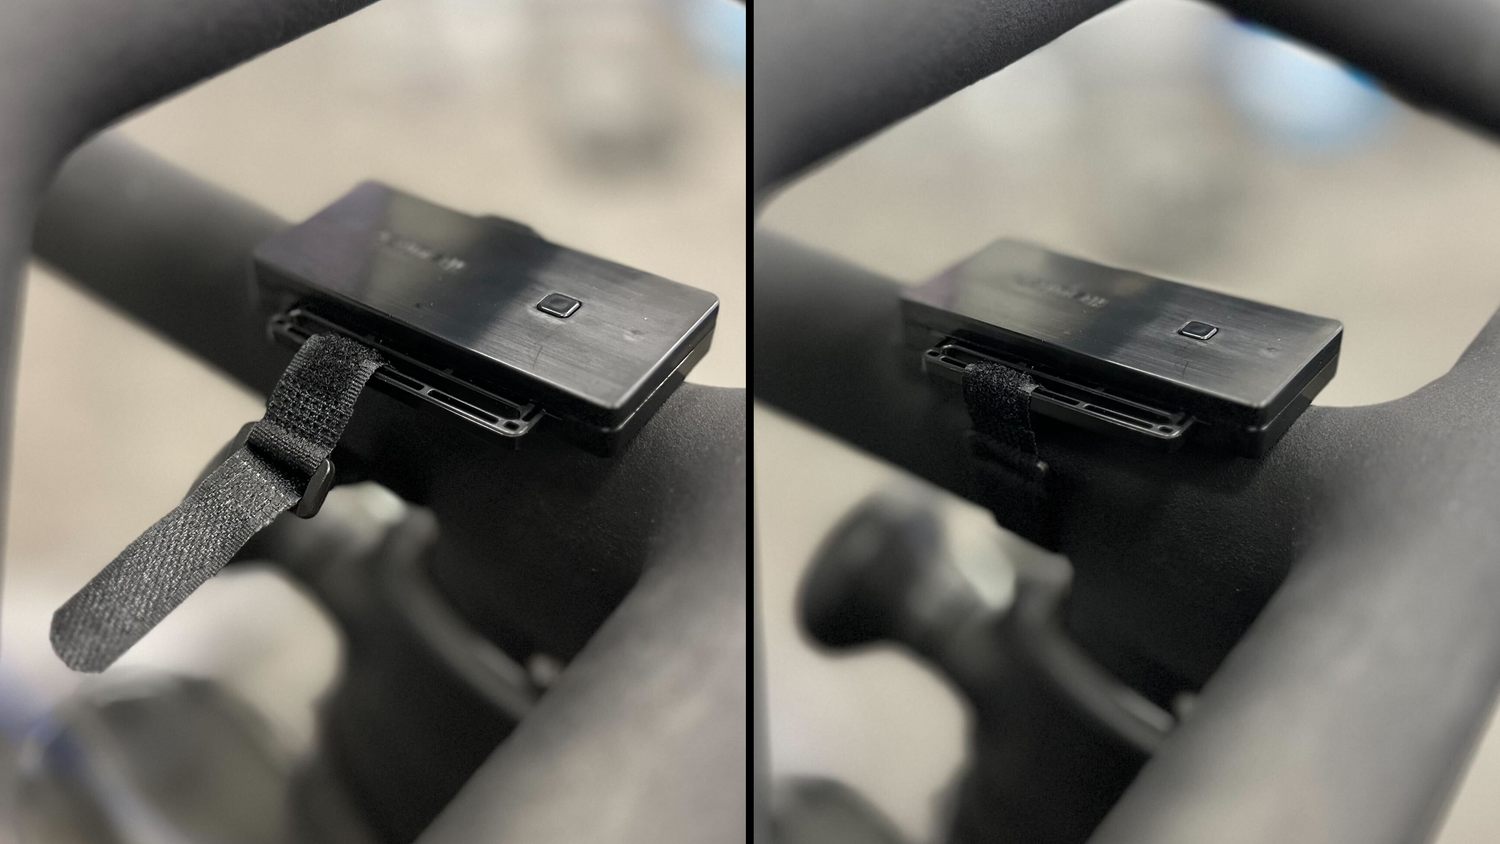
Secure the fitswitch onto your peloton using the velcro strap as shown. Make sure the device is firmly secured by the strap and does not move easily when pressing the button.
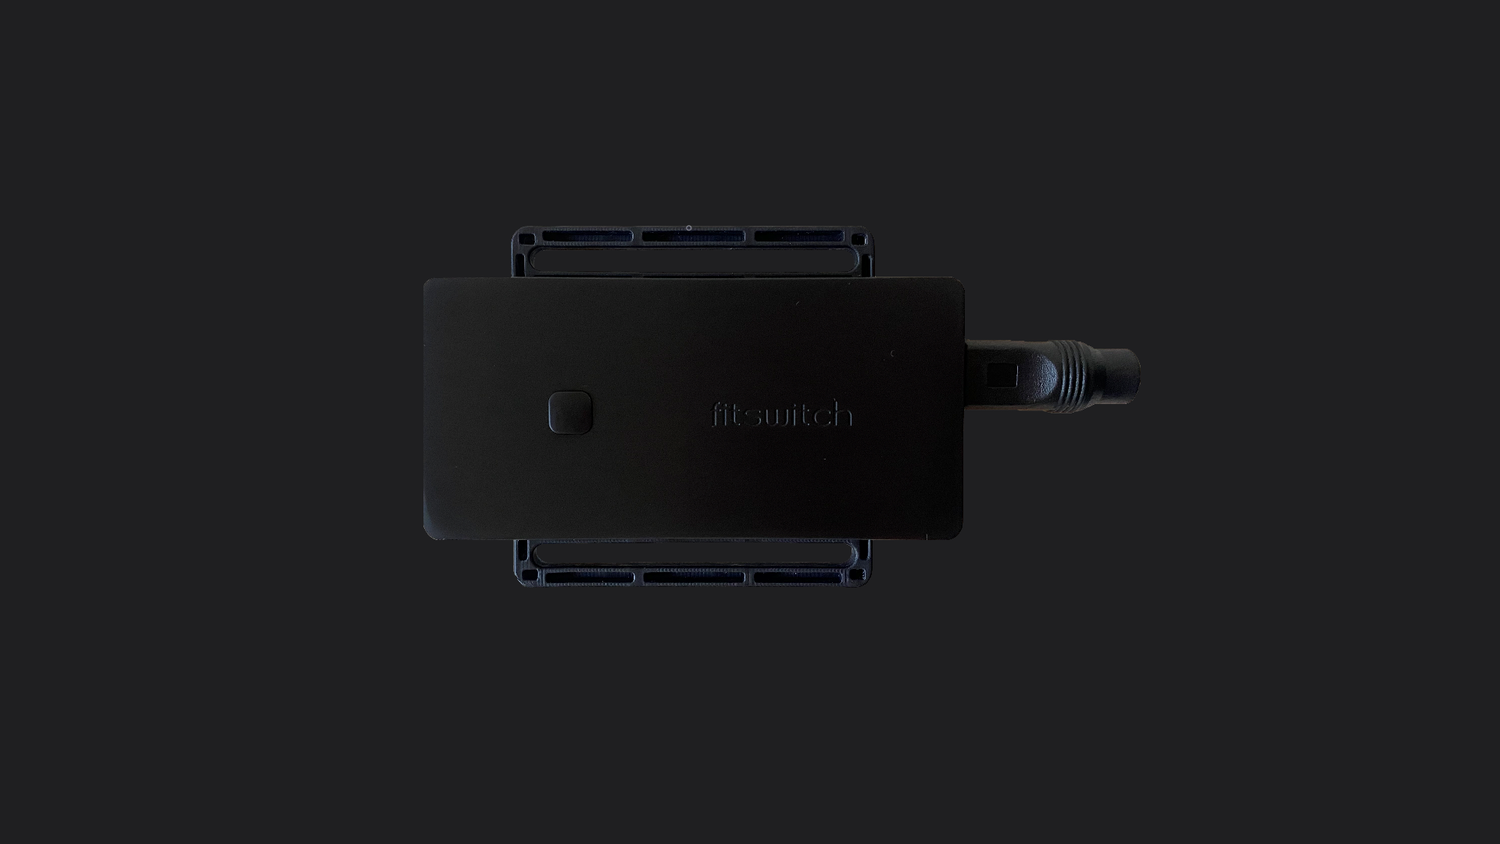
Connect power to fitswitch using the USB-C to USB-A cable and wall adapter, via an outlet
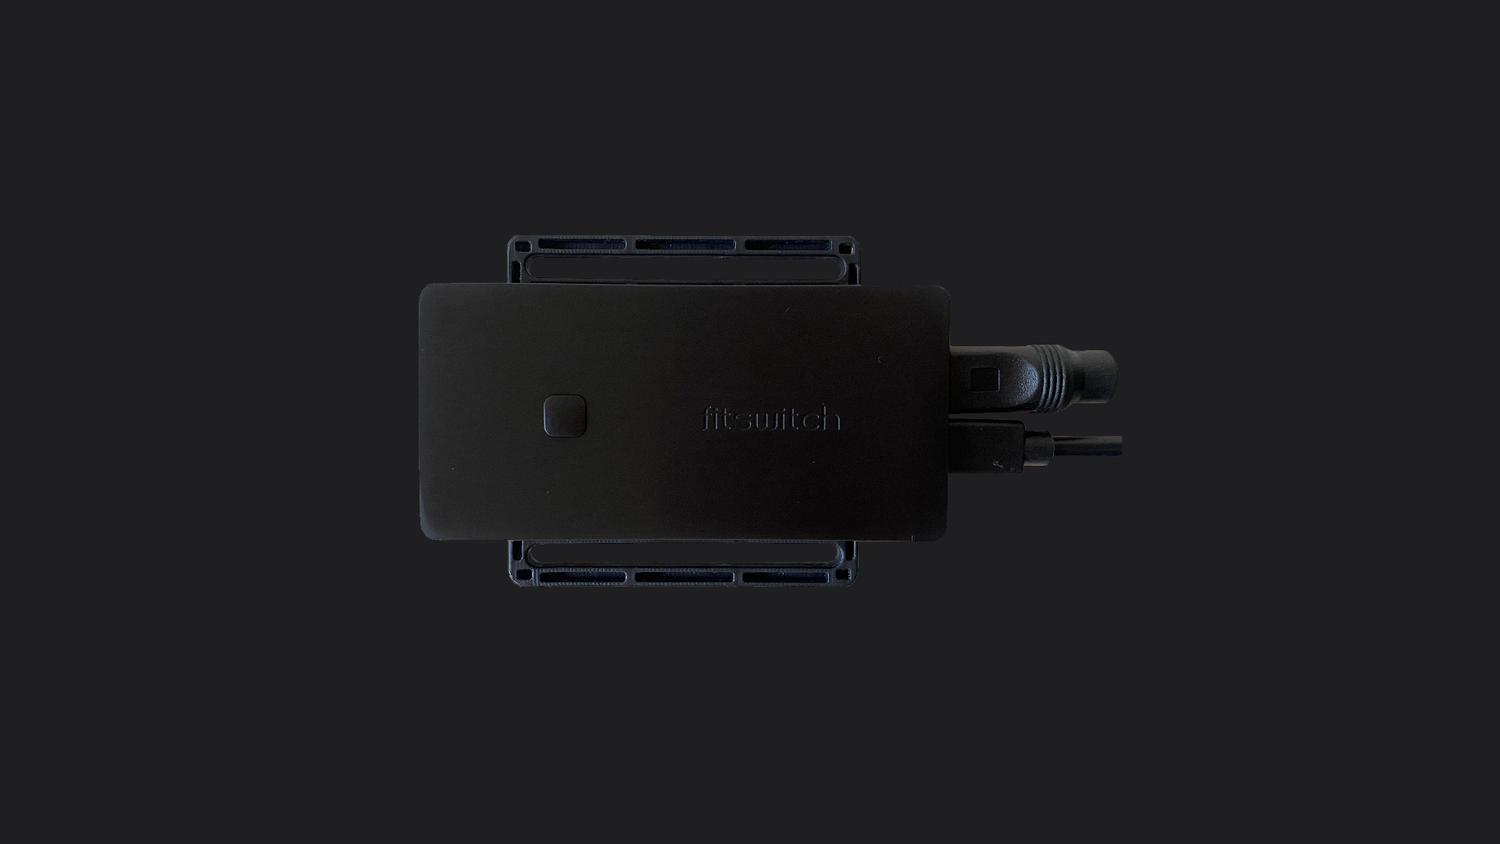
Connect micro usb to fitswitch.
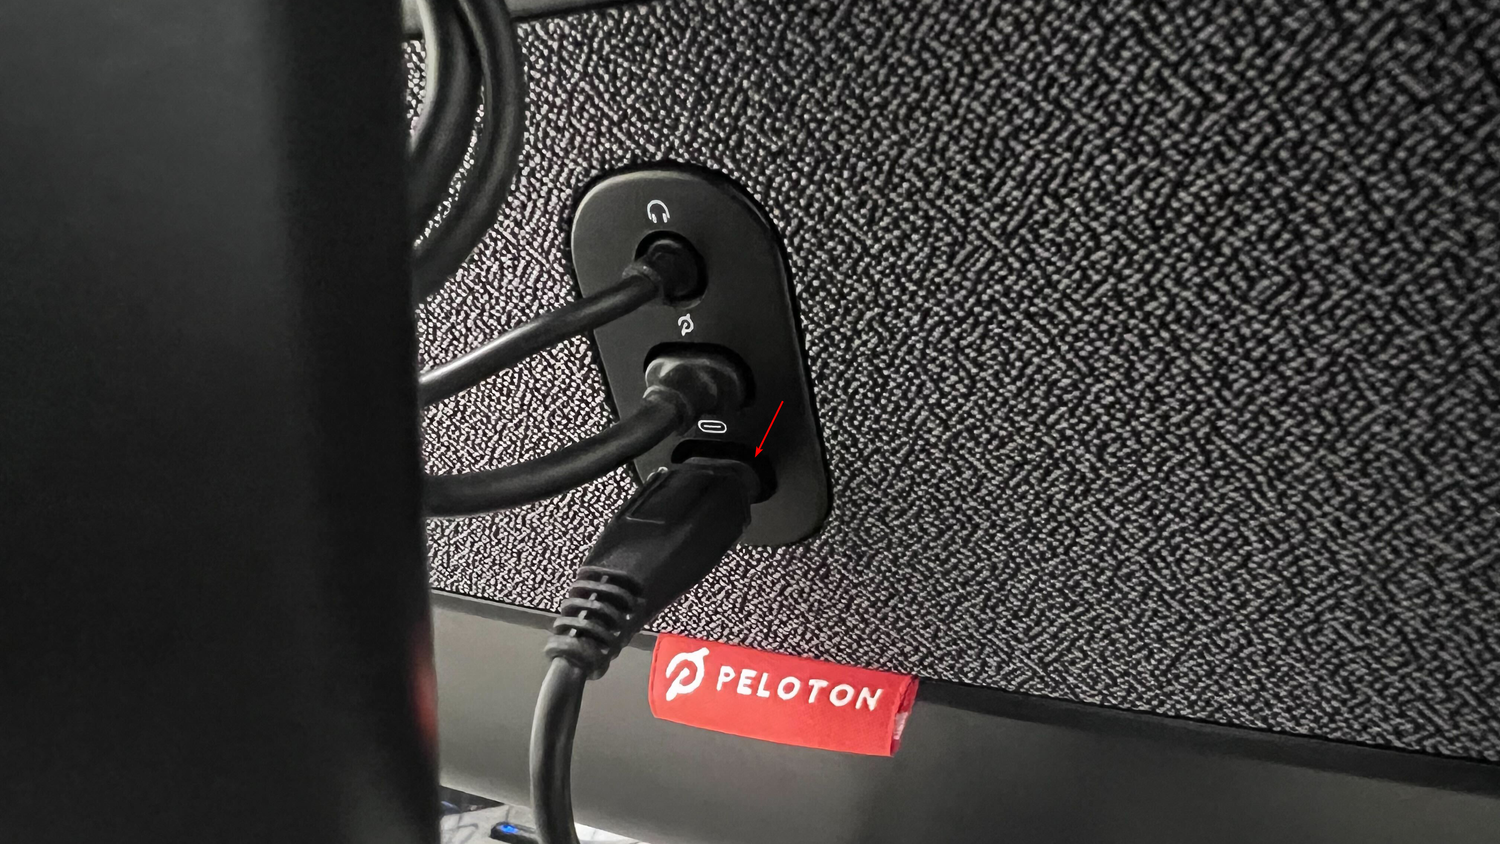
Connect the USB-C end of the fitswitch micro USB cable to the bottom USB-C port on the Peloton
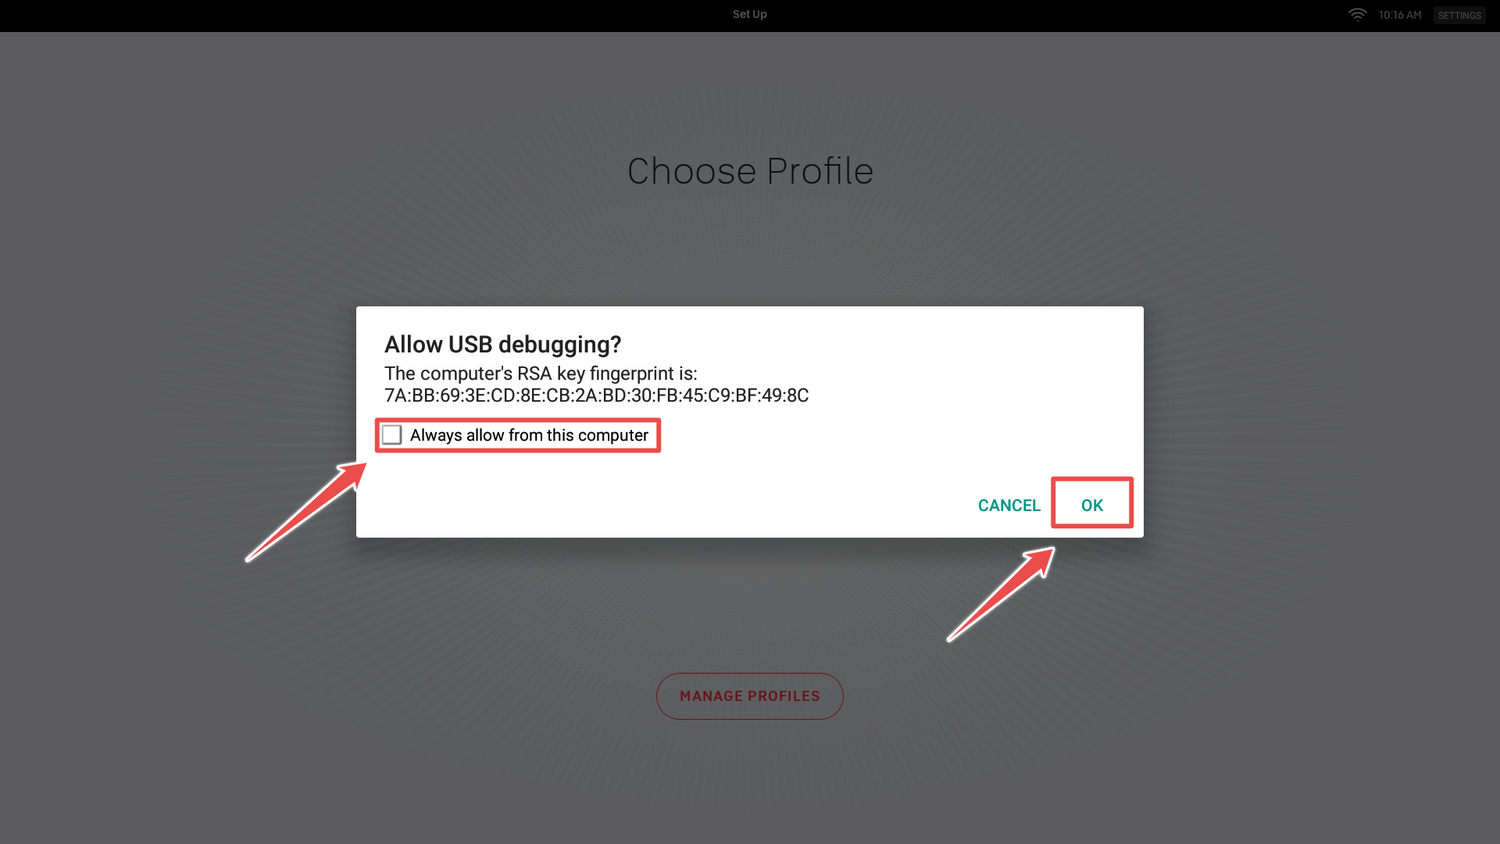
fitswitch light will glow white, once light turns purple, select "Always allow from this computer" and tap ok.
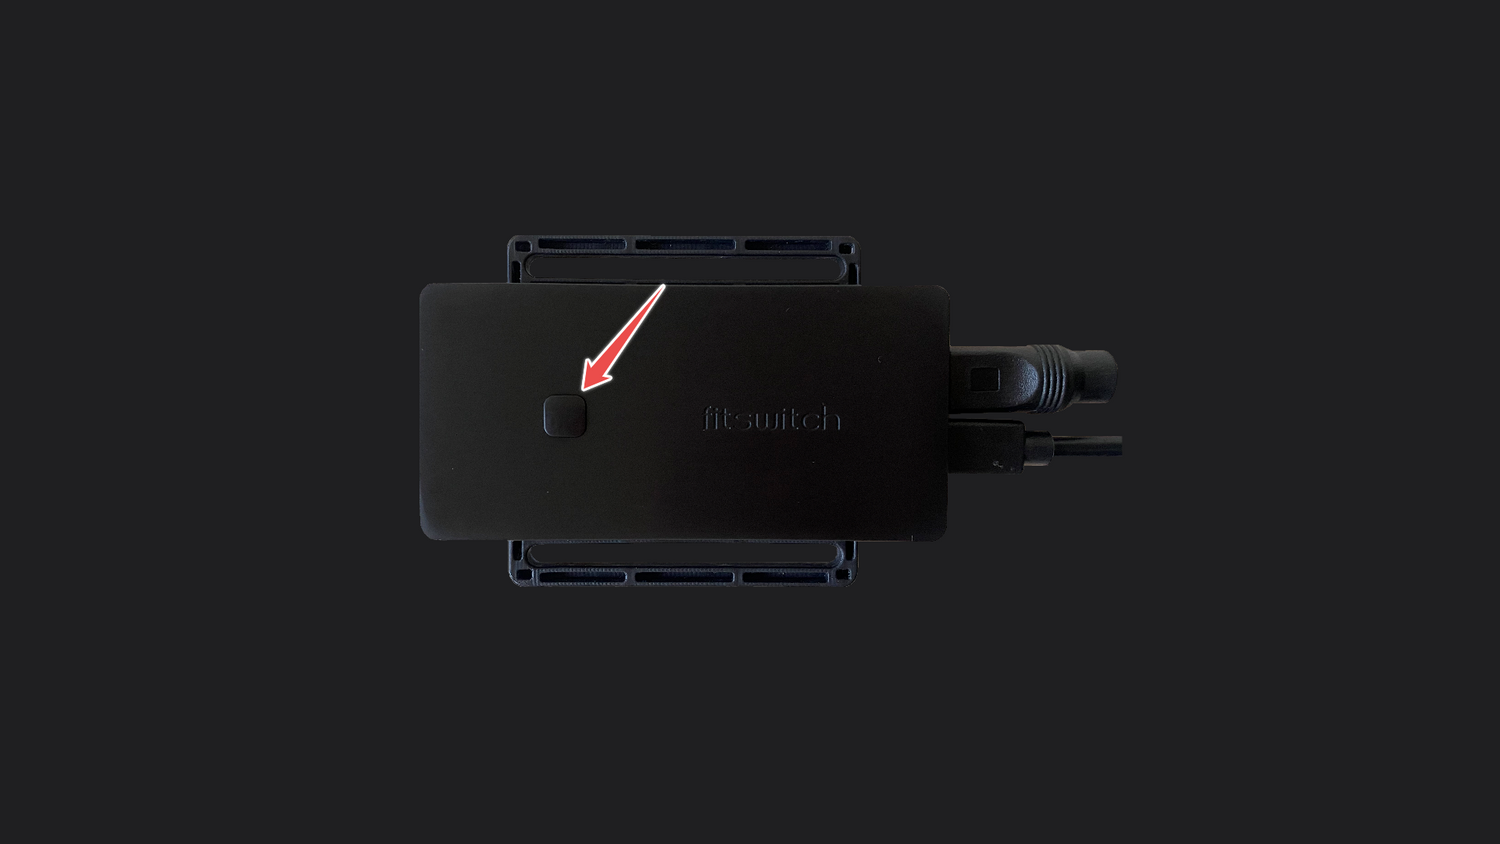
Click button to install fitswitch app on to Peloton. fitwitch light will glow purple while installing and green when complete. fitswitch app will launch automatically.
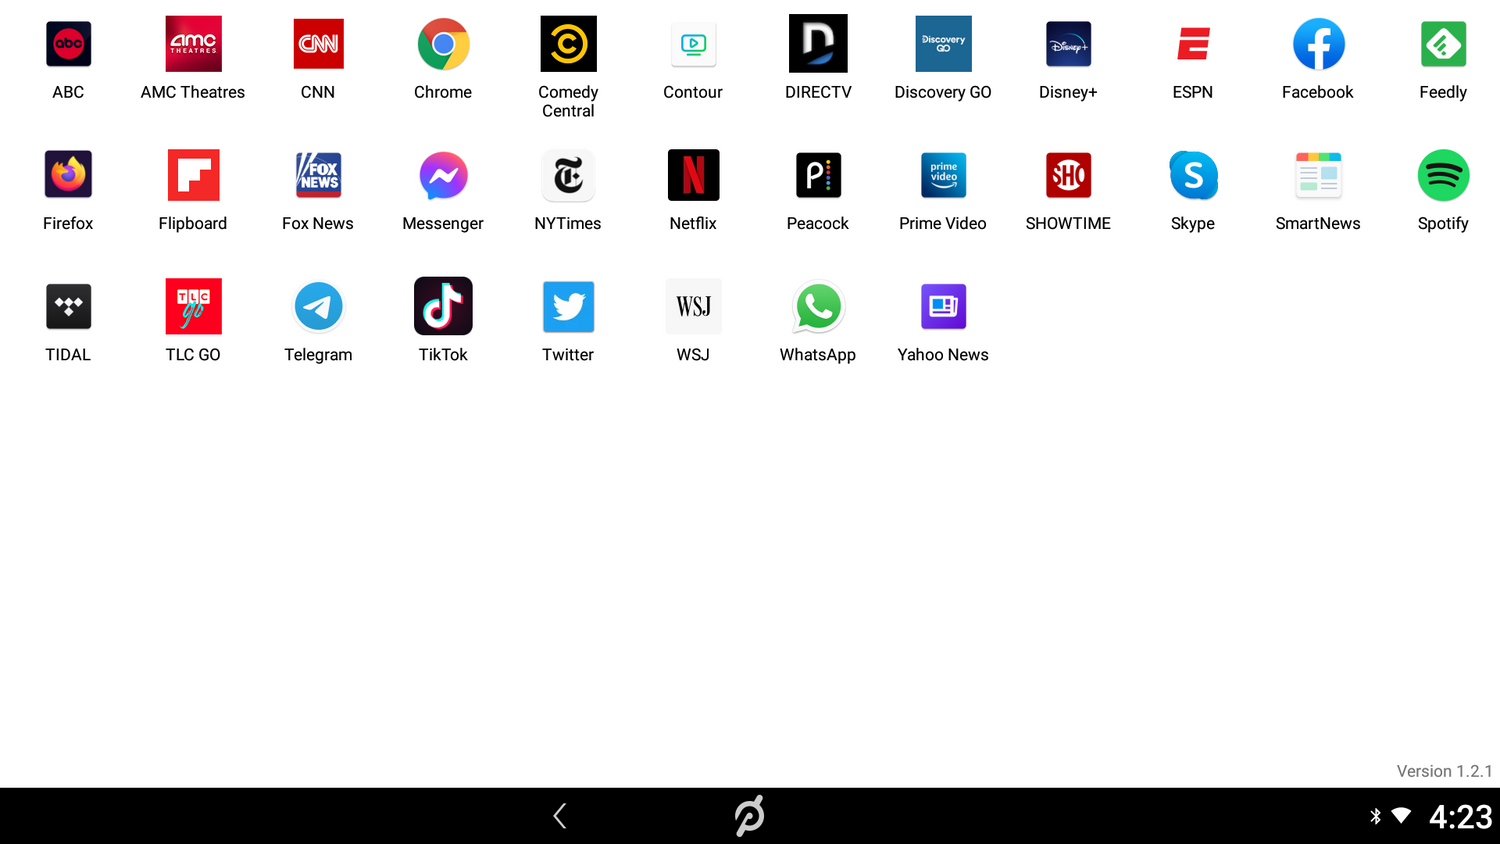
Download apps by clicking on their icon. Now, start watching!
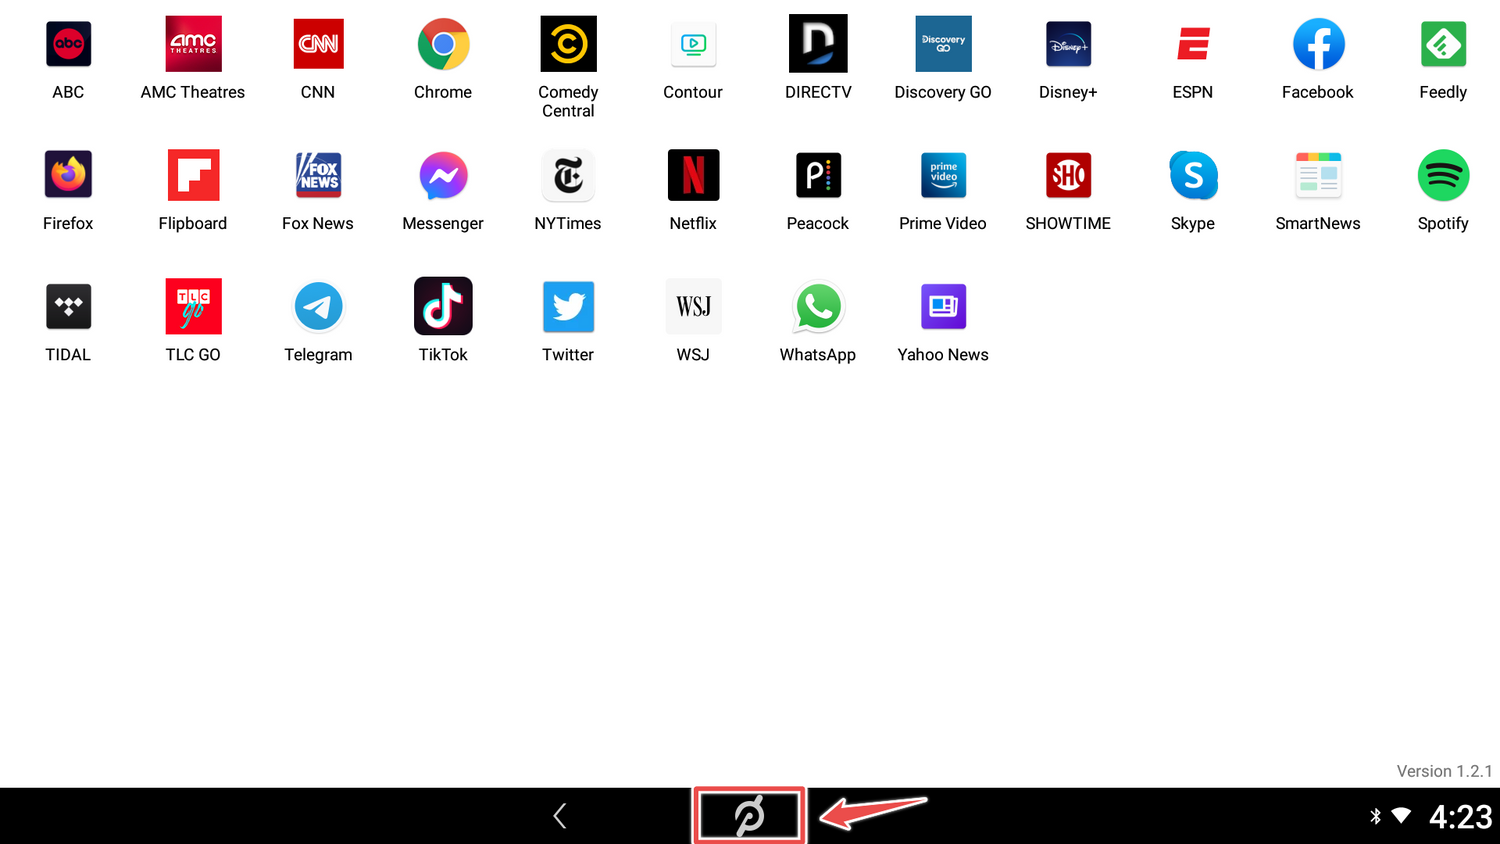
To return to the Peloton app tap the "P" at the bottom of the screen.
1
/
of
18
